How To Add A Banner To A WordPress Sidebar Widget

In this video, I would like to show you how to add a banner to a WordPress sidebar widget. I already have three banners on the website and I would like to add a fourth banner to my website. The idea of a banner on a website is to send the viewer to a special offer or something that may be of interest to the user. In this case, I’m sending customers to my domain and hosting shop.
So, first of all, we need to go to our WordPress dashboard. I am then scrolling down to appearance, where you will then see widgets. I want my widget to send people to my domain and hosting website here.
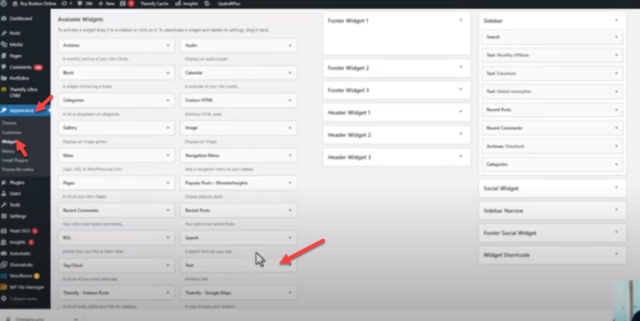
I then want to find the text box, I have marked the text box with an arrow. By left-clicking with the mouse, I can then drag the box towards my sidebar. I can change the position of widget at any time. The diagram shows where I’m drying the text box to the side widget.
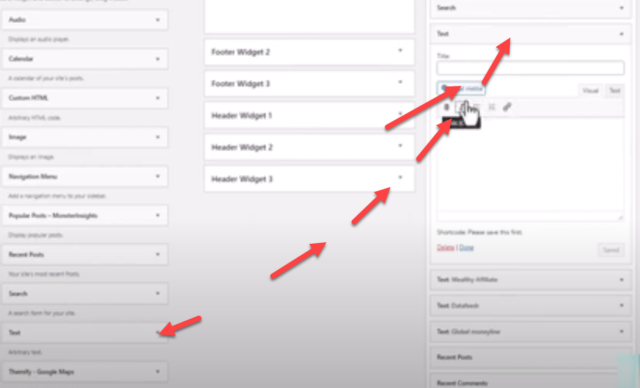
Add media
Let’s now go to add media; you can see that there are already a number of diagrams and photographs in my media library. I have already loaded my banner into the WordPress library. If you need to add images at any time, click on the upload file button and then go to where you’re required file is on your computer. You can load multiple images at once. I probably wouldn’t upload more than 10 images at a time, just to avoid the server crashing.
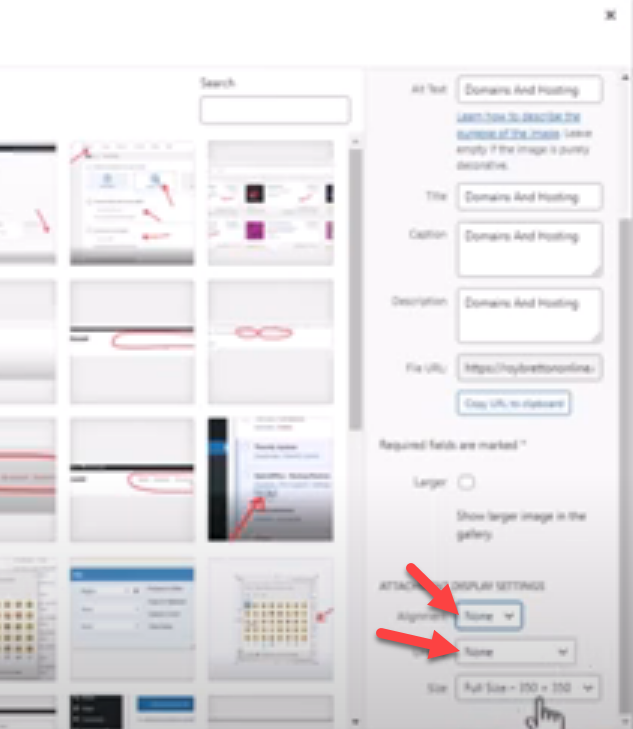
We then need to click on the required image or banner in our media library. It’s very similar to uploading a photograph to a blog post or webpage. In the attachment display settings area, I have set the alignment to none. The link to the drop-down menu to none and set the banner to full-size, which is 350 square pixels. If you scroll to the top of the screen, you can see that WordPress gives me the details of the size etc. We can now click on insert and that will put the banner into our widget.
It’s always good to give files and folders a name; in this case, I will call this widget “domains and hosting”.
We can actually edit our banner from within the widget area if we need to; I do not need to do anything this time.
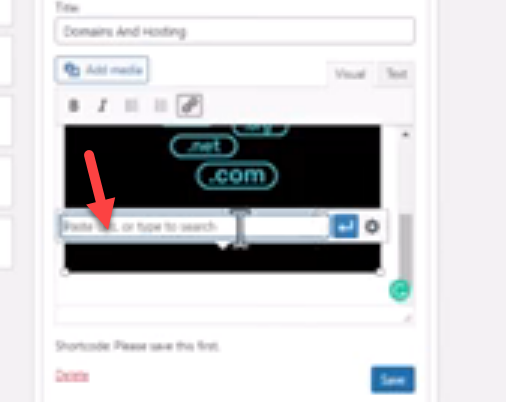
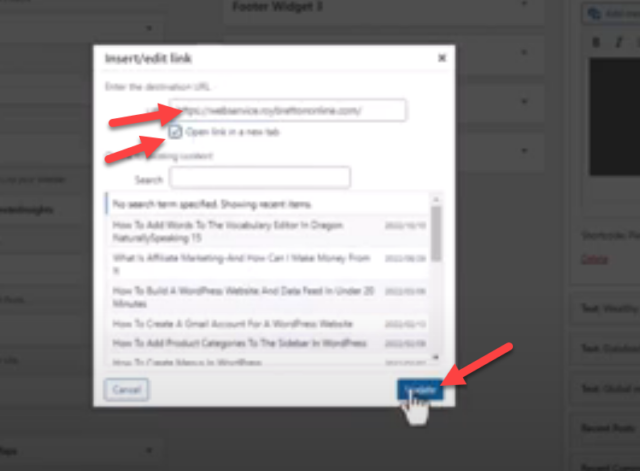
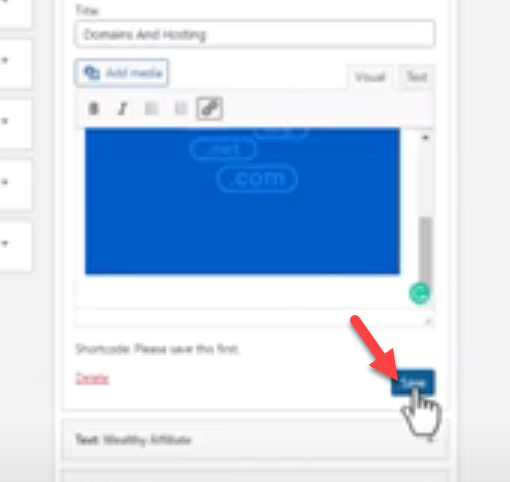
I now need to click on the link button to add my link that goes to my domain and hosting store. It’s always good to paste website addresses in to make sure that the address is accurate; otherwise, it may go somewhere else! Once I have pasted my website address into the widget, I then need to click on the cog. I normally tick the box that says open in a new tab, you don’t have to, but I prefer to. We must link click on update or save as shown in the diagram.
The Widget Is Now Ready!
We can now go across to the front end of our website and see the widget displayed. You may have to refresh your website by either clicking on the refresh button or pressing F5 on the keyboard. You can see that there our new widget is on the top of all the other widgets.
Widgets Can Be Moved
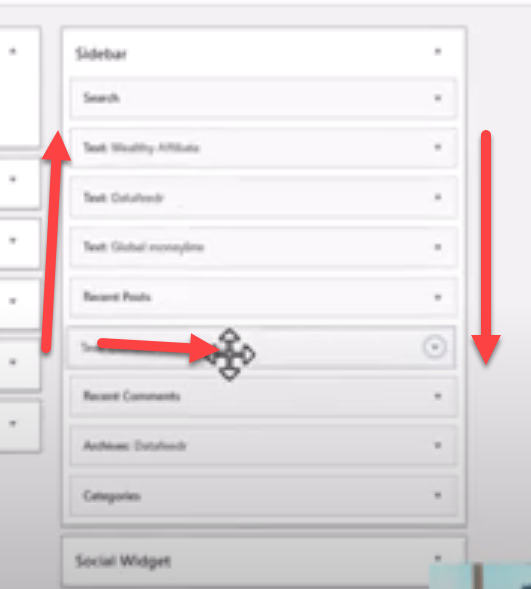
Any widget can easily be moved up and down by going back into the dashboard and right-clicking on the mouse over the widget that we want to move. Please see the diagram, WordPress automatically saves the widgets.
If you have any questions, I am here to help; just leave a comment within the YouTube comments.
You can visit my number one recommendation here if you want to know more about setting up an online business.