Today I would like to show you how to create menus in WordPress. Over the past few weeks, I have been creating the process of building a WordPress website complete with a Datafeed. You can see previous posts or you can go to my YouTube channel to find more videos.
Watch The Video Below To See How To Create Menus In WordPress
Creating Our First Menu
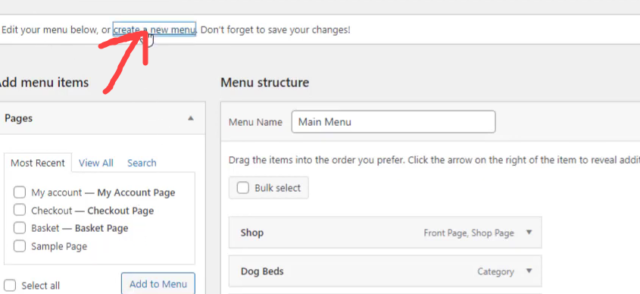
Here I will show you how to create menus in WordPress. As you can see in the screenshot, we are going to remove the top-level menu. You can see the diagram below.

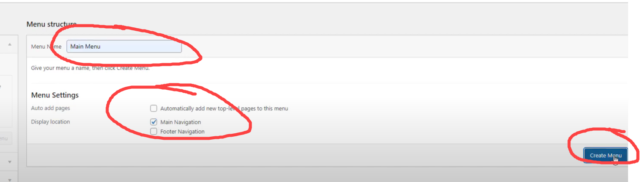
So let’s go to our WordPress dashboard and then click on appearance and then menus. We will then create our first new menu, I’m going to call the menu name, “main menu”. We will then click on the main navigation and then click on create menu. Make sure that you save the menu before you click away.
We can now see that our menu has now gone and we can start afresh.

Screen Options
We now going to go back to our WordPress dashboard and in the right-hand corner at the top, we can see screen options. If we click on screen options, I will then click on product categories and product tags. You can then close this window by clicking on screen options.

Creating Product Categories
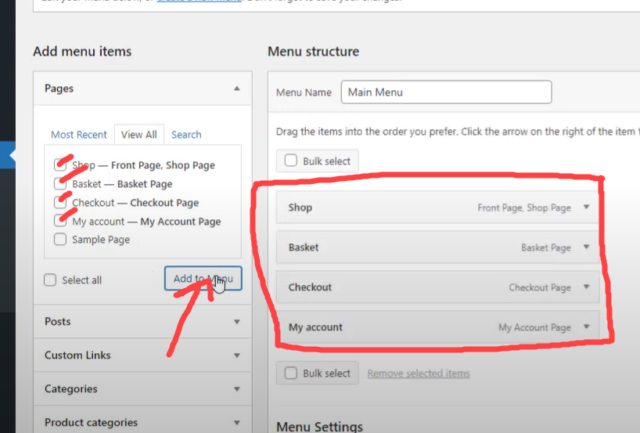
We are now heading back to the WordPress dashboard again and going to appearance and then menus. We will now create some product categories. So, in pages, let’s click on the view all tab and then select, shop, basket, checkout, my account. We are then going to click on the add to menu button, you will then see the items that have been added to the menu.
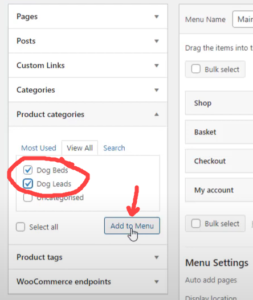
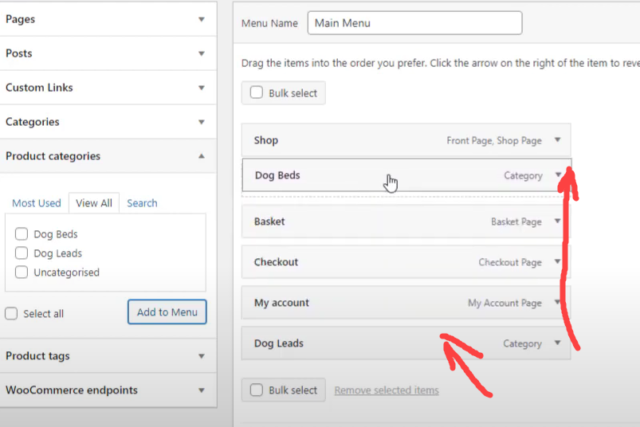
Now we need to move down to product categories which are just below pages. In product categories it is showing the most used tab, let’s click on view all. I will click dog beds and dog leads and then add these categories to the menu by clicking the add to menu button. I will also drag dog beds and dog leads below the shop category. We then need to save the menu. Once again make sure it save before you move away from the page.
Now if we go back to the front page of our website and refresh it, we can now see the main menu.

Creating A Footer Menu
Once again we are going to dashboard, appearance and then clicking on menus. If we go towards the top of the page we can see there is a create a new menu button. Let’s click on there and create a new menu.
We now need to name and menu so I will call it the footer menu. I will then click below and click footer navigation and then create menu.
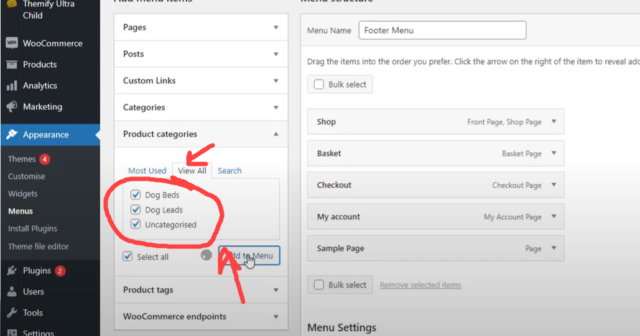
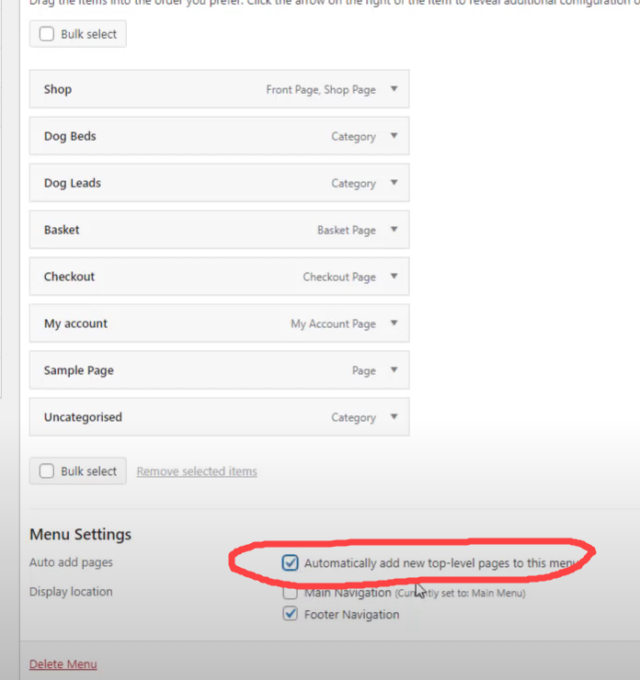
Now in the pages menu, we are going to click on view all and then select all and then add to menu. You can now see that dog lead and dog beds have been added to the footer menu. We can move the menu by dragging them up or down depending on where you require them. I also then click automatically add new pages to this menu. By doing this it will automatically add a new category to the top level. We then now need to save our menu.
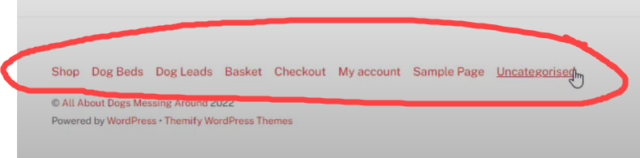
Now let’s go to the front page of our website and see that the menu is not there yet. However, once we refresh a page the menu will appear.
To Conclude
I’m going to stop here as I think this is enough for one video or one lesson, I will be doing more follow-up videos shortly.
If you want to know more about working online it’s worth looking at my getting started page. Also if you want to know how I started online and more about me, please click here.
I’m here to help so if you have any questions to ask please click on the YouTube comments and leave your comment there. I do try and answer all comments and questions.