How To Change Your Nameservers
In this video, I would like to show you how to change your nameservers. I’m currently in my Go daddy account, different accounts may look slightly different. However, I hope these instructions will help you be able to change your nameservers easily and efficiently.
I have created a video below which is the easiest way to change your nameservers. I will also add a documented process below the video.
When you first purchase a domain you need to be able to point the domain to your hosting services. Your hosting provider will normally provide you with your nameservers. If you do not have hosting you can purchase hosting here or if you would like to try some free hosting, go here.
Go to your domain provider
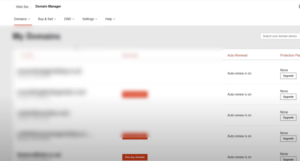
I’m going to go to my domain provider, which in this case is Go Daddy or Wild West Domains, they are both the same!I am in domain manager where I have a list of domains, so I will click on the domain where I need to change the nameservers and then I will go to, “Manage DNS”.

Changing the nameservers
Once I have clicked on the “DNS tab” I will be taken to a page with lots of info. Scroll down and you will see “nameservers”, in my case the nameservers are already in place.
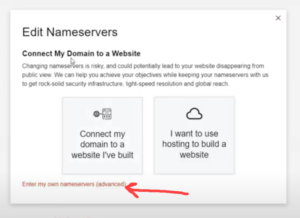
So, let’s now click on “change nameservers” which will take us to the diagram below. You need to click on “enter my own nameservers (advanced)”. Don’t be nervous about the “advanced” word, it’s very straightforward!

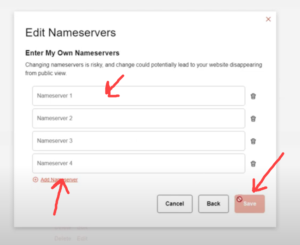
Now you can see below that we have an “Edit Nameservers” window open. In general, most domains only have two nameservers, the most I have ever seen have been three nameservers. You can see that the window opens with space for two nameservers. We can add as many nameservers as required by clicking on the “add name server” tab.
Make sure you save your settings!

In general, I have found that nameservers normally change within a few minutes. However, many hosting companies will say allow up to 24 hours, in my experience this rarely happens.
To Conclude
It’s very easy to change your nameservers as you can see. Interfaces can vary slightly, but hopefully, with my instructions, you should be able to find your way around various websites.
As I mentioned earlier in this post, if you’re looking for paid hosting, you can try various packages here. The other way to receive free hosting is to join a membership that I am part of. Their hosting works well and it’s great for start-ups, I still use the hosting for new websites. Why not look and see if you can take advantage of the free hosting and the great training that is available?
If you would like to work online, you may like to read my “Getting Started” page. In my opinion, if I was starting today, this is where I would go.