Camtasia – Importing Files

The title of my video today is Camtasia – importing files. In this video, I want to show you how to use Camtasia and how to import files. So, let’s go and open Camtasia, which you can see on my screen. I’m using Camtasia 23. I have the maintenance agreement, so it keeps me updated with the latest software, which is handy, and you also get a few other benefits.
I created a video a few days ago on how to create your first basic video with Camtasia. You can see the video and blog post here.

Camtasia Maintenance Benefits
These benefits include online support, which includes logging into your computer if necessary to assist with a question or issue. Regular software upgrades, which are free of charge or included in the maintenance fee. There is also a certification course that can be taken to improve your expertise and skills in video creation.
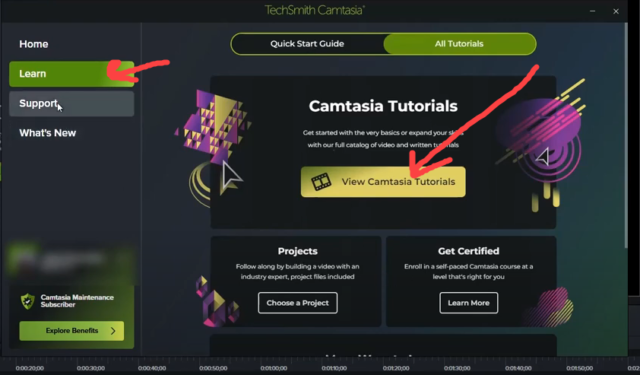
So, let’s click on ‘Home’, and here we are on the homepage. We have ‘New Project’, ‘New Template’, ‘Open Project’, ‘New Recording’, etc. Then here, which is quite useful, learn all tutorials, quick start guide, etc. So, and then there’s ‘Get Certified’, ‘Projects’, etc.
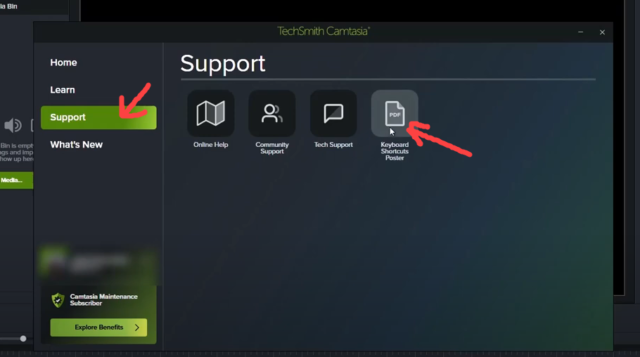
And then if we go to ‘Support’, ‘Online Help’, ‘Community Support’, ‘Tech Support’, ‘Keyboard Shortcuts Poster’ – that’s quite useful. It just gives you all the shortcuts you need. And then, ‘What’s New’. So, this was updated today by the look of it, 21st of November. Camtasia maintenance gives you all the various updates as the software is regularly updated with little improvements that mount up over a year.

Importing media
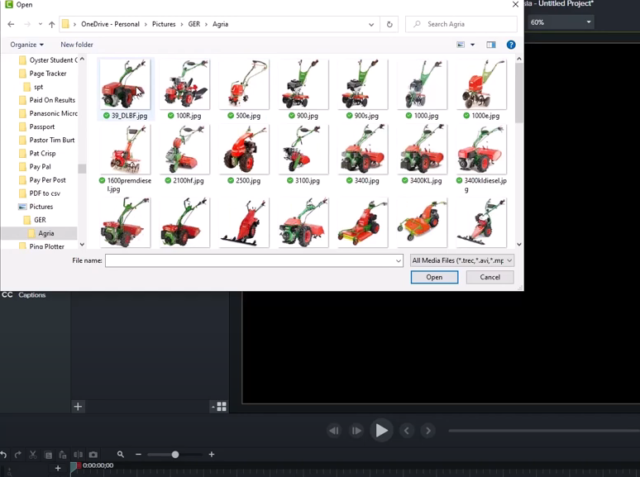
So, let’s go to our media bin now. If we want to import something into our media bin, we can go up to here, ‘File’, ‘Import’. So, let’s go ‘Import Media’. This one will be fine so we have found that folder, let’s open another media folder. ‘Import Media’, find another folder. Let’s go somewhere else, and we can just put a couple of these images in. You can put any image you want, but just for the sake of the video, I’m literally just picking anything. They are not relevant to what we are doing.
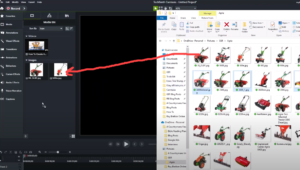
So, there we have it. Now, another way of doing it – I’ve actually got three monitors here, but let me just drag this page across here. So, let’s say we want to drag some more images across. Now, we can either drag them one by one, or we can do multiple images by clicking on the control key. So, that one, that one, that one, for the sake of argument, and then let’s just drag them across like that.
Moving Images And Videos To The Timeline
There you go. Let’s get rid of this out of the way of the screen. Now, with these images, we can pull this video down onto the timeline here. There, and then with these images, we can just pull them onto the timeline down here, wherever we want them. We can move them about accordingly. This one here, this one here. And now, these images will default and play for 5 seconds when you play your video. And we can drag if we want to extend them. We can pull them out a bit, pull them onto the next one, and so forth. We can move them about depending on where we want them.
Another way to find files and images quickly is to double-click on the media bin, which will bring up the last folder. But obviously, we can navigate to any folder from there.

Default folder
Okay, something else I should have mentioned is, in Camtasia, there is a default folder which is here. So, let me drag this across from the other screen. There you go. It is ‘This PC’, ‘Documents’, ‘Camtasia’. Now, I also put some of my videos into another folder. I have another drive on my computer, so I’m filling my hard drive up twice as quickly, so I often come here and delete them. Just take care that you’re not filling your hard drive by having videos in multiple places. But, once again, this is the default on a PC: ‘PC’, ‘Documents’, ‘Camtasia’.

Files Can Be Numbered
Regarding these files that we have in the media bin now, mine are randomly numbered, but you can create a project and number them. So, if you had them like 1, 2, 3, 4, and 5, you could drag all these down together, and they would be in numerical order, which can sometimes make it easier for your project, depending on what you’re doing. But I have just pulled these out of random folders, so they’re not going to come out in any order. Generally, to be fair, I just pull them down to the timeline, as that seems to be fairly quick.
So, let’s go on to the next section. So, now, if we press play and click ‘Play’ here, you will see that our items come up. We can speed this up. We can move this across quicker, so it goes on to the next one. Play, and then it’ll go on to the next image. We can extend these for as long as we want or as short as we want. And in a minute, there’ll be a gap.
Right, now I could join the images up if I wanted. Here comes the next image, by just dragging that like that. So, now if we wanted to save this project, I prefer to go ‘Save As’, and then we put it in whatever folder we want to. I don’t need to save this, so I’m going to cancel it. That’s if you just do a ‘Save’, it will go to the default folder. Because I have other folders that I use, I prefer to use ‘Save As’. This isn’t the folder I normally have my files going to; we can put it wherever we want, by project, or wherever we want to.
To Conclude
Having used Camtasia for around 15 years, I can definitely recommend the software. I can also recommend the maintenance package, not only for the software updates but also for the ongoing support, which is really useful. So, if you have any more questions on this, please feel free to comment. I will be making more videos. And thank you very much for watching.