Creating Product Sets In Datafeedr 2020

Today we are going to be looking at creating product sets in datafeedr 2020. Over the last few months, I have been creating a series of videos on creating a WordPress website from scratch. In my previous post, we talked about how to select networks and merchants in Datafeedr. In this video, I’m going to show you how to add product sets using the datafeedr WordPress plug-in.
The datafeedr WordPress plug-in enables you to populate your website with content very easily. It’s possible that in a very short period of time your website can be loaded with content. However, you will need to write blog posts and link to the various product pages to gain traction on your website.
One of the many great things about the data feed plug-in is its ability to update products automatically. For example, if there is a product change of price or something similar, the product will automatically be updated. Or if the product is no longer available it will automatically be removed, unless you create a rule that allows a product to stay on your website.
Datafeedr can also be used for price comparison sets and much more. The functionality that data feeder offers is huge, why not take a look at the software?
You Can Watch Our Creating Product Sets In Datafeedr 2020 Below
So, let’s take a look at creating product sets in DataFeedr 2020.
In the previous video and blog post we were adding networks and merchants to our WordPress website. The great thing is that these networks and merchants can be added at any time. However, you must be signed up to the various networks merchants before trying to add them to Datafeedr.

Creating Your First Product Set
So, if we go to our WordPress dashboard and go to product sets and then add new. Obviously there are no product sets to show at the moment as this is our first product set. Once we have added the first product set there will be a section that says, “All Product Sets” and the product sets will not be showing empty.
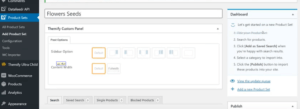
So, if we go to “add new” we need to name our product set, I’m going to name the product set, “flower seeds”. You can name the product set at this stage anything you like. However, the name needs to be something relevant to your product set.
On the right-hand side of the product set page, there is a list of items to carry out which will create your product set. As you can see on the video, our first list of to-do items has a line through as we have completed the first task.
Adding Different Fields
Datafeedr allows us to create different fields when we are creating a product set. I normally just use two or three fields as I find it is adequate and works well for finding the necessary product feeds. I have selected “any field” and “has image”, I will sometimes use “product name” depending what comes up in my search results. It can sometimes be a bit of trial and error, the more you use the software, the easier it gets.
Add a Title for Our Search
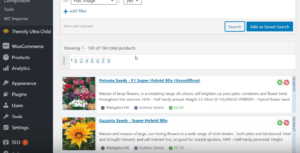
We are now going to add a title for our search, my title is going to be “flower seeds” as this is precisely what I am looking for. Sometimes when I’m carrying out a search, I may experiment using slightly different titles, even making word plural can make a difference. You can practice as much as you want with different words and using different fields. We are now going to click on the search button and see what comes up, I have no idea how many items Datafeedr will find.
Our search has found 746 products on eight pages, that’s a lot of flowers!

Deleting Unwanted Products
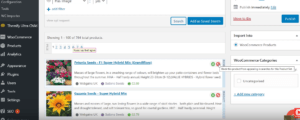
Sometimes unwanted or rogue products will appear in a search, these can be very easily removed or added to our product set. Simply scroll down the products and check that your products meet your search criteria. Repeat the process on all the pages. If you find a rogue product, simply click on the right-hand side, on the red button, where it says, “block product” and this will put the rogue product in “blocked products” section.
If we want to put the “blocked product” back in our product set, click on the tab “blocked products” and you’ll see the blocked products, click on the “unblock product” and your product will be returned to the product set.

Add As Saved Search
We now have to click on the “add as saved search” button. If we don’t click on this button, we will not save our product set. So your product set will not be able to upload to your website. I have actually forgotten to save a product set several times; I then end up with empty product sets!
Create A Category
We now have to go and create a product category, you can find the categories on the right-hand side of your product page. For this category, we are going to create a category called “flower seeds”. We don’t have any parent categories at the moment, so we just save our category. It’s important to name this category relevant to your products as this will be seen on your website.
Now Publish Your Product Set
Now we are already to publish our product set, click on the publish button and your products will be waiting to be uploaded automatically.
Bumping Up The Product Set
We are now going to go to product sets where you can see that we have one product set. It takes time for products to upload so we have the option to bump up a product set.
If we check the box next to the product set and then use the drop-down menu and go to; “bump product set with priority” this well tell the cron to upload the product set. This may not happen immediately, just be patient! We have to remember that there are a lot of products to upload, 746 to be precise. This will take some time.
I am looking at my product set 12 hours later and it is 85% complete, so we are nearly there. The initial product sets take time to upload. Once we have all the product set up, it’s a much easier task as the product sets are just updated automatically.
Please feel free to comment on this blog post or video, I am here to help you with Datafeedr. If you would like more information on Datafeedr, please click on the link below.