How To Create A Gmail Account For A WordPress Website
In this blog post and video, I would like to show you how to create a Gmail account for a WordPress website. I always like to try and create a separate Gmail account for every website that I create. There are several reasons for this; one of the reasons is that if I ever want to sell the website, I have everything in one place. Secondly, I can create various Webmaster tools through my Gmail account. For example, Google search console, Google Analytics, Google Kepler and much more. And of course, we can also associate a YouTube channel with an email address. To me, this is the most organised way to have everything in one place and keep things simple.
You Can See The Video Below That I Have Created, Or You Can Follow The Transcript Of The Video With Diagrams
How To Create A Gmail Account For A WordPress Website
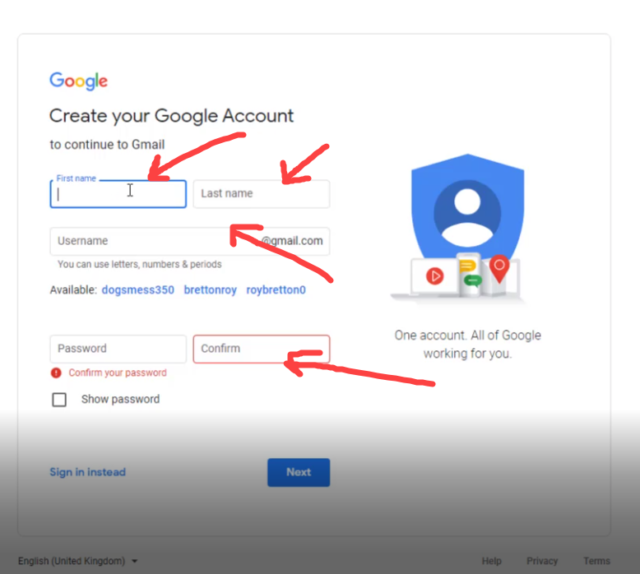
Most of us already have a Gmail account, if you haven’t, then you need to go create one. If you already have a Gmail account, just go and click on the photograph on the top right-hand side of your Gmail account. You will then see a drop-down box that says add another account. Click on, “add another account” add your name, your new email address and create a solid password. You can see the diagram below.
If the email address that you already want is taken, then choose something similar or something that relates to your website. We can then click on next.

Use Your Telephone Number For Recovery Purposes
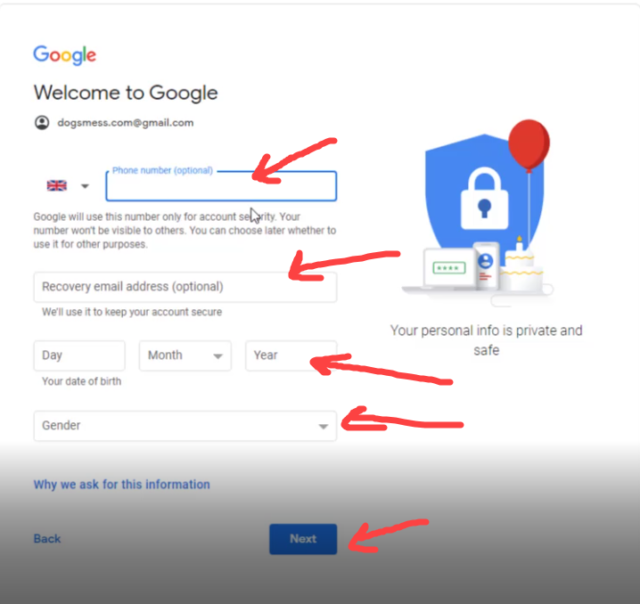
It’s always good to use your telephone number and a different email address should you need to recover your Gmail account. I will add the necessary and my date of birth. We can then click on next where we will be asked to verify our account. Once we click on the send verification code, it will come through quickly. As you can see on the video, a text message has been sent through to my computer, via my phone.
We can now paste the verification code into the verification box. Just take care when you copy and paste verification codes as sometimes an extra character can be added in by mistake. We can now verify the Gmail account.

Personalised Gmail Settings
Once your account has been verified Google will take you through a few personalised settings. For the sake of the video, I will skip through the personalised settings. The settings can be changed at any time in the future. There are normally a few privacy settings that we just need to confirm if we want to use a Gmail account.

Now You Have A New Gmail Account
You should now be able to see your Gmail account. A box will normally open asking you if you want to access smart features, I normally say yes to smart features. So now your Gmail is ready to use.
There are a few other settings that you can personalise. For example, you can customise your inbox, I normally use the default settings. You can add a profile image to your Gmail account. You can import contacts and emails to your Gmail account. And finally, you can add Gmail to your smartphone.
To Conclude
I have been working online and researching Internet marketing since 2004. The power of the Internet and its potential never fails to amaze me. If you would like to find out more about how to start an online business you may like to read my getting started guide. You can also find out more about me here and my top recommendation for getting started online.
